CAD快速看图分图的详细教程介绍

我们先用CAD快速看图打开图纸,点击VIP按钮选择“CAD图纸分割导出”功能,也可以右键点击图纸,出现右键菜单,选择功能。
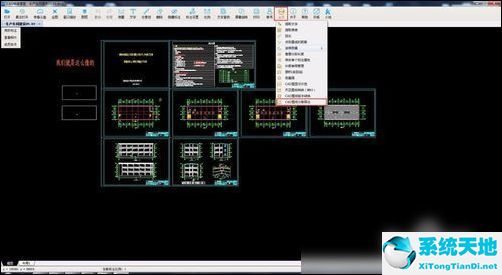
这时候我们选择后,弹出对话框,点击“选择区域”。

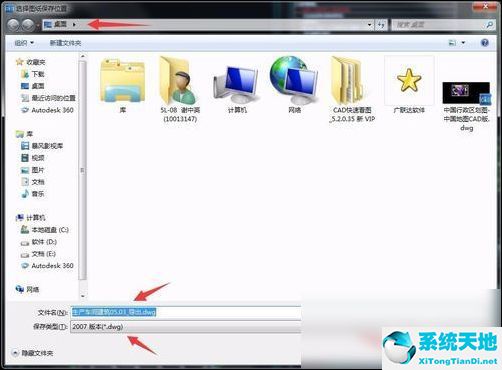
在使用鼠标左键框选需要分图的范围。然后点击“导出图纸”。


此时弹出对话框,我们可以选择分图后保存的位置、名字、图纸版本,点击保存按钮。点击后,提示我们保存成功。

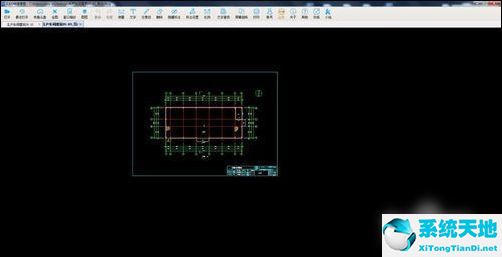
此时可以在保存的位置找到分出来的图纸。

最后一步我们打开图纸后,可以看到已经把需要的部分导出来了,很简单吧。
根据上文讲述的CAD快速看图分图的详细操作过程,你们自己也赶紧去实践下吧!


 苏公网安备32032202000432