coreldraw2019怎样将图片插入图形中
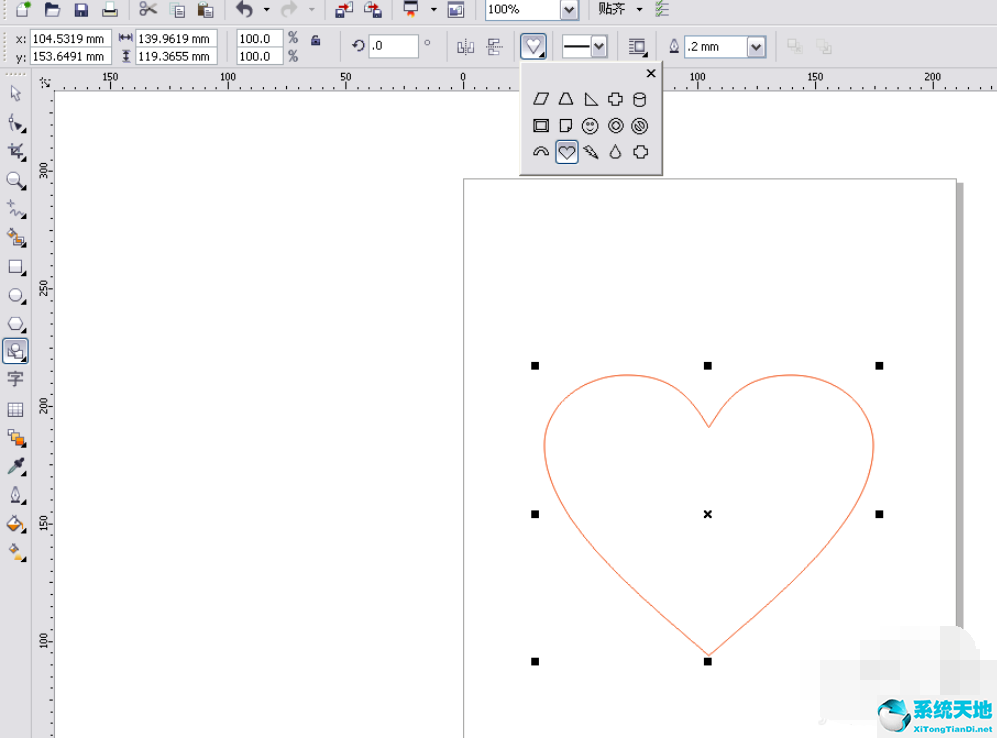
第一步:首先我们打开电脑上的CorelDRAW2019软件,新建一个基本图形心形(如图所示)。
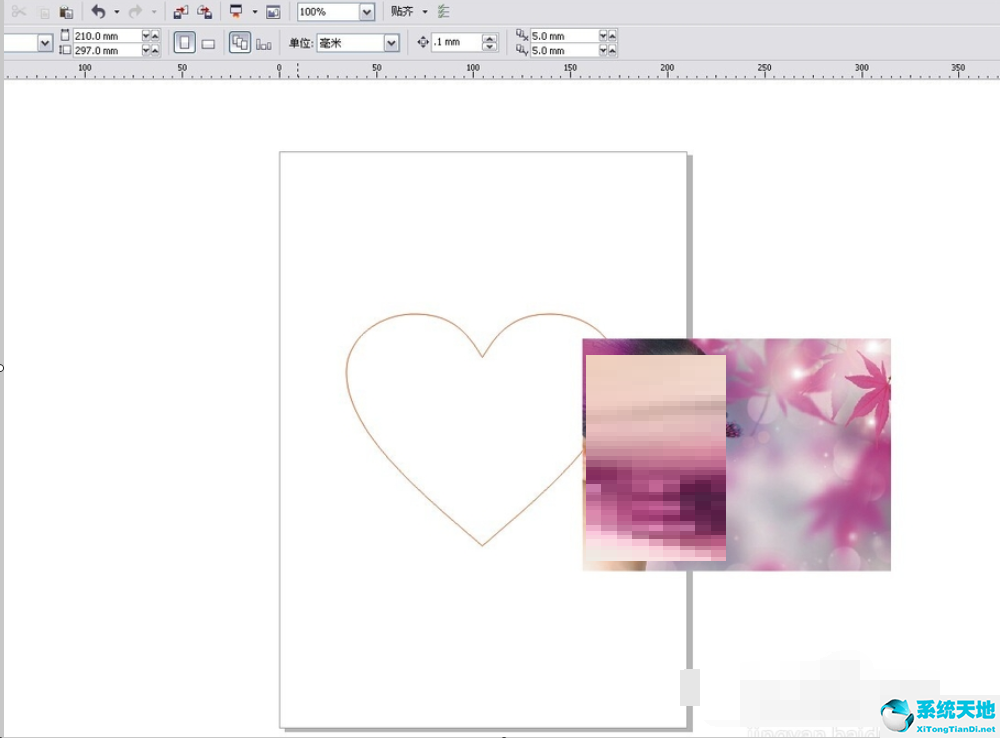
第二步:然后我们点击导入图片,将图片移到自己想要的形状附近(如图所示)。
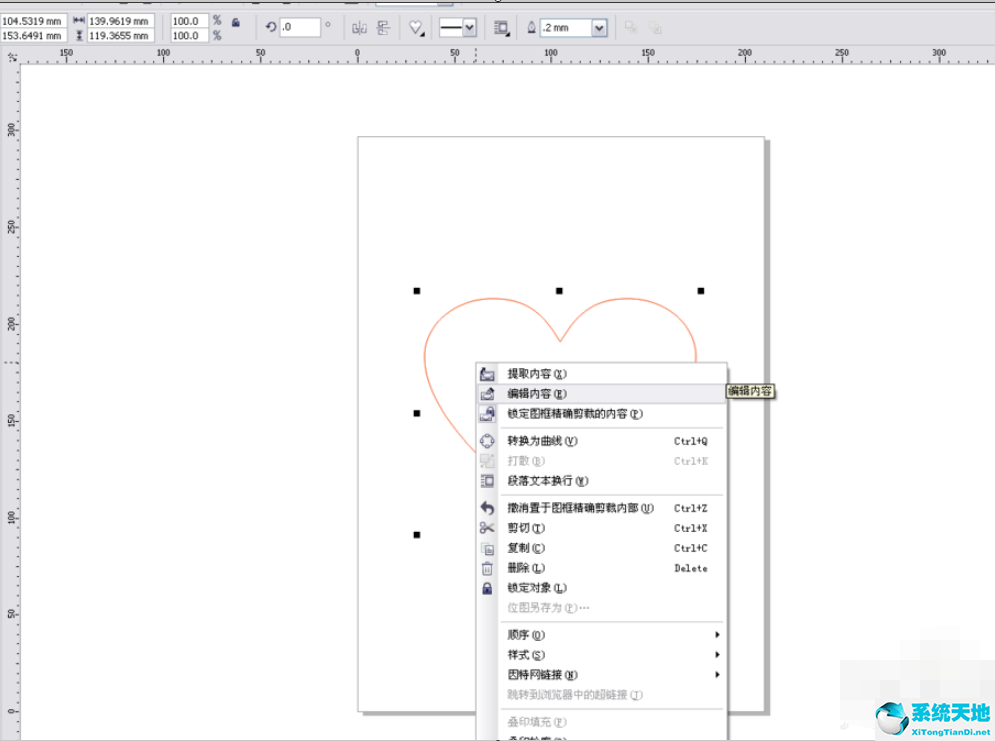
第三步:接着我们点击菜单栏效果,图框精确裁剪放置到容器中(如图所示)。

第四步:接下来我们将心形选中,单击鼠标,点击编辑内容(如图所示)。
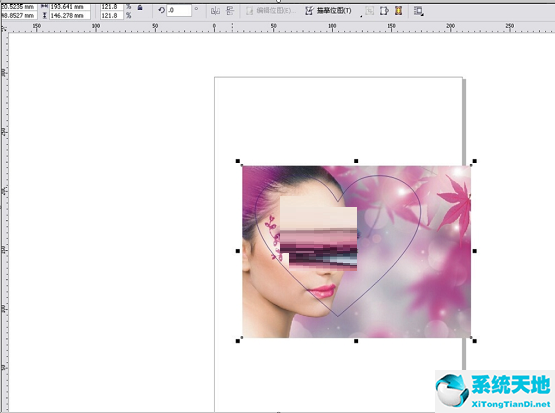
第五步:然后我们调整图片大小,将其移动到适当的位置(如图所示)。
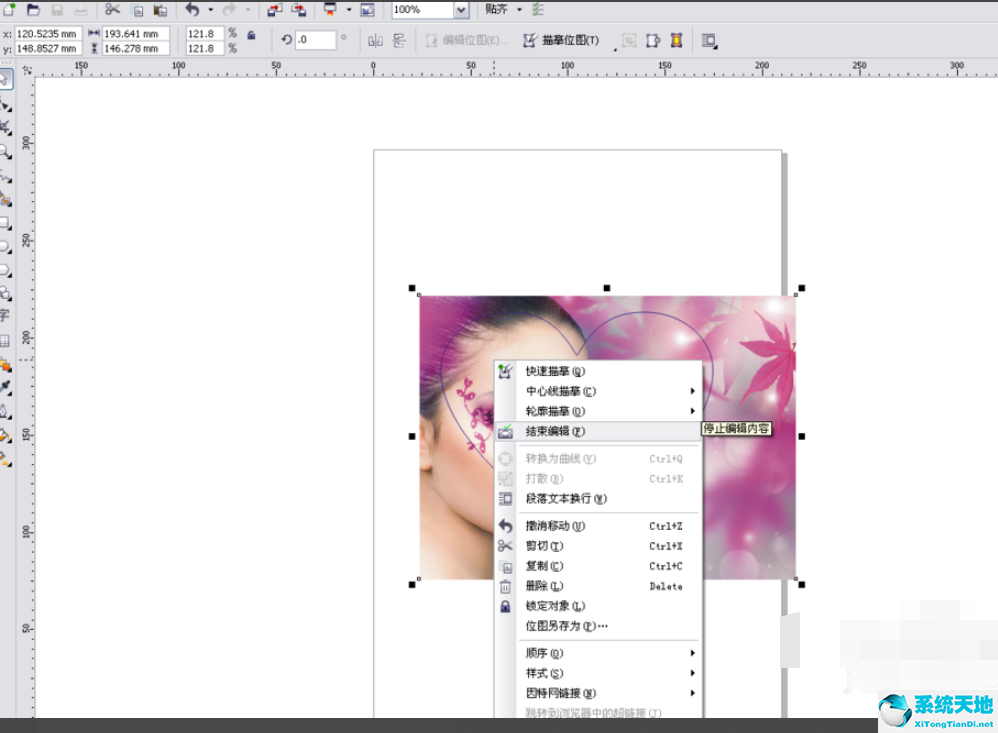
第六步:最后我们,选中图片,鼠标右击,选择结束编辑,就可以将图片插入图形中了(如图所示)。
以上就是小编给大家带来的coreldraw2019如何将图片插入图形中的全部内容,希望能够帮助到大家哦。


 苏公网安备32032202000432