win8解除网速限制的操作方法
最近有Win8用户反映,之前有设置过限制网速,导致后来干什么都很卡,那么,Win8如何解除限制网速呢?接下来,针对这一问题,小编就来教教大家Win8解除限制网速的方法。
1、在键盘上按住“Win键+R”启动运行菜单;

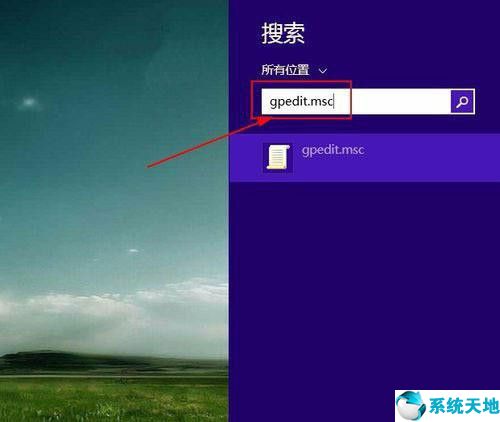
2、输入“gpedit.msc”回车,打开“本地组策略编辑器”;


3、当然,你也可以在“搜索框”中输入“gpedit.msc”,然后点击打开,同样可以打开“本地组策略编辑器”;
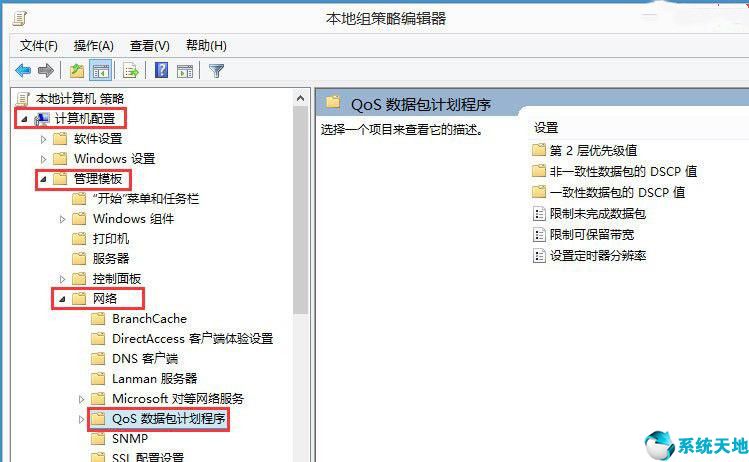
4、展开“计算机配置”下的“管理模版”下的“网络”,然后左键单击“网络”下的“QoS数据包计划程序”;
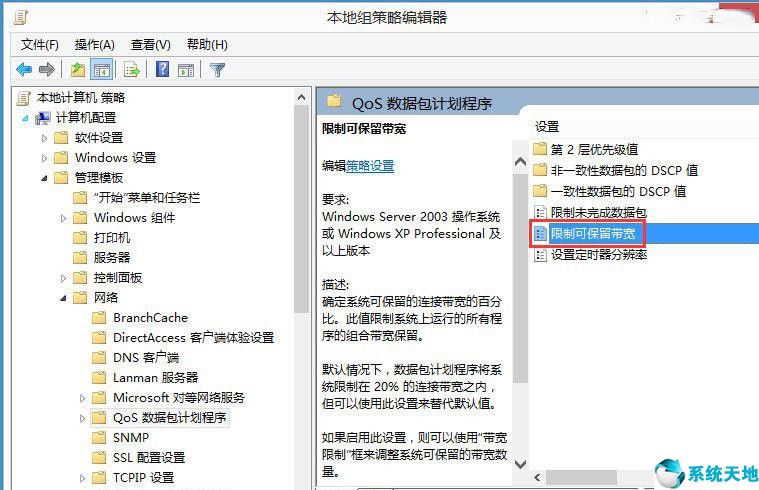
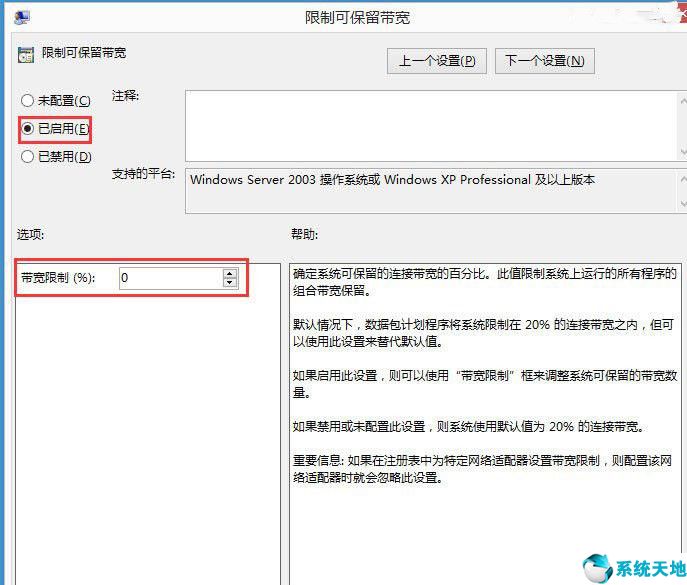
5、双击“限制可保留带宽”一项,打开“限制可保留带宽”窗口;
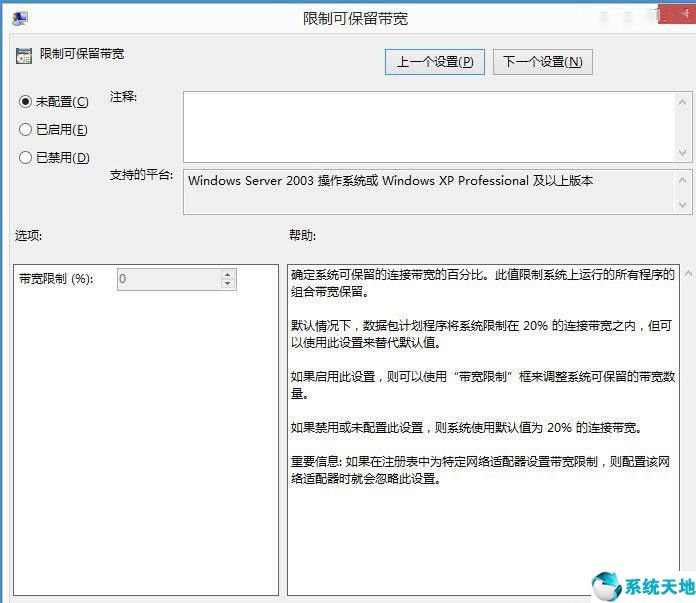
6、选择“已启用”,然后设置“带宽限制”为“0”,然后点击“确定”即可,设置完毕。
以上就是小编为大家带来的Win8解除限制网速的方法,希望能对您有所帮助
本文来源于Win10专业版,转载请注明出处。
1、在键盘上按住“Win键+R”启动运行菜单;
2、输入“gpedit.msc”回车,打开“本地组策略编辑器”;
3、当然,你也可以在“搜索框”中输入“gpedit.msc”,然后点击打开,同样可以打开“本地组策略编辑器”;
4、展开“计算机配置”下的“管理模版”下的“网络”,然后左键单击“网络”下的“QoS数据包计划程序”;
5、双击“限制可保留带宽”一项,打开“限制可保留带宽”窗口;
6、选择“已启用”,然后设置“带宽限制”为“0”,然后点击“确定”即可,设置完毕。
以上就是小编为大家带来的Win8解除限制网速的方法,希望能对您有所帮助
本文来源于Win10专业版,转载请注明出处。


 苏公网安备32032202000432