Win10系统打字光标乱跳怎么办?Win10系统打字光标乱跳的解决方法
很多小伙伴还不了解Win10系统打字光标乱跳怎么办,所以下面小编就带来了Win10系统打字光标乱跳的解决方法,有需要的小伙伴赶紧来看一下吧。
Win10系统打字光标乱跳怎么办?Win10系统打字光标乱跳的解决方法
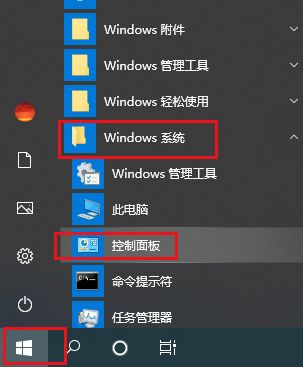
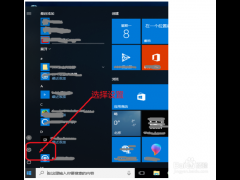
1、首先打开开始菜单,点击windwos系统,控制面板,如下图所示。
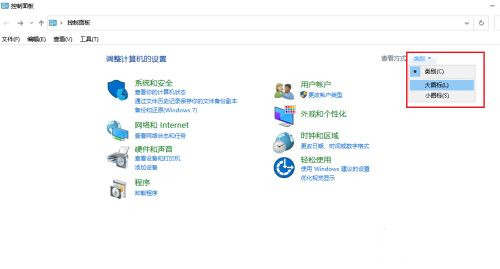
2、然后弹出对话框,打开类别下拉菜单,选择大图标,如下图所示。
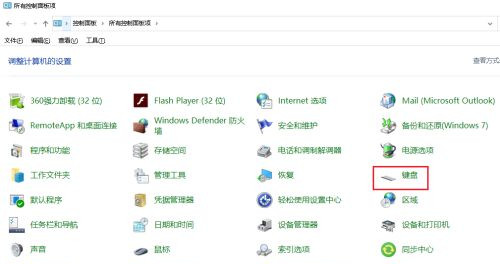
3、接着点击键盘,如下图所示。
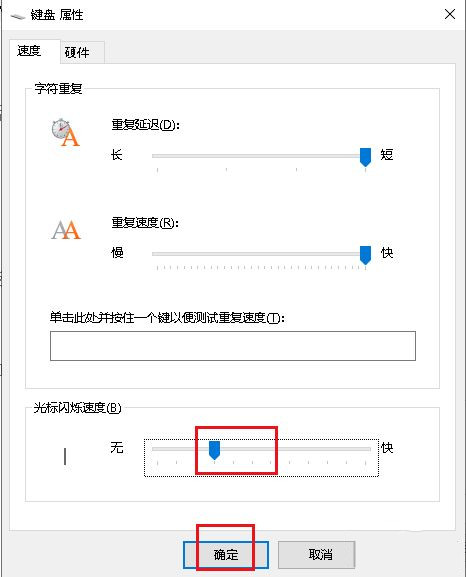
4、之后弹出对话框,将光标闪烁速度调低,如下图所示。
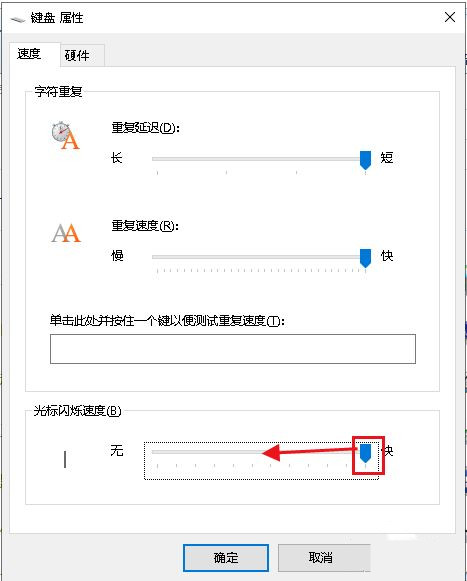
5、调整到中间或中间偏下,点击确定。
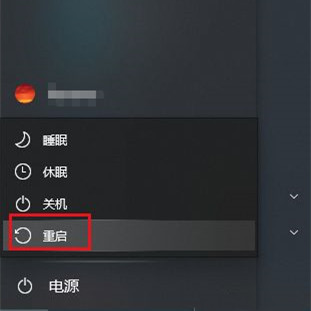
6、最后重启电脑,设置完成。

 苏公网安备32032202000432