Win10家庭版如何调整桌面图标间距大小?Win10家庭版调整桌面图标间距大小的方法
近期有很多小伙伴咨询小编Win10家庭版如何调整桌面图标间距大小,接下来就让我们一起看一下Win10家庭版调整桌面图标间距大小的方法吧,希望可以帮助到大家。
Win10家庭版如何调整桌面图标间距大小?Win10家庭版调整桌面图标间距大小的方法
1. 同时按下【Win】+【R】键,运行对话框启动后,输入指令“regedit”并单击确定,如下图所示。

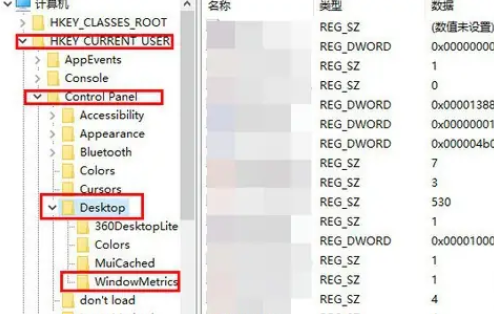
2. 启动注册表编辑器后,逐项点击左栏,直至定位至:HKEY_CURRENT_USERControl PanelDesktopWindowMetrics子项,如下图所示。
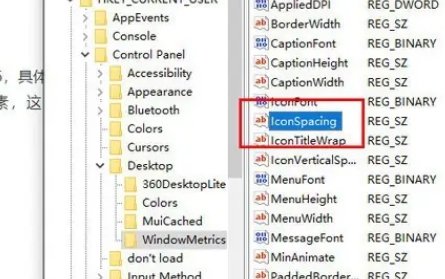
3. 在打开的WindowMetrics子项中,寻找名为“IconSpacing”的字符串值,双击并更改其键值,如下图所示。
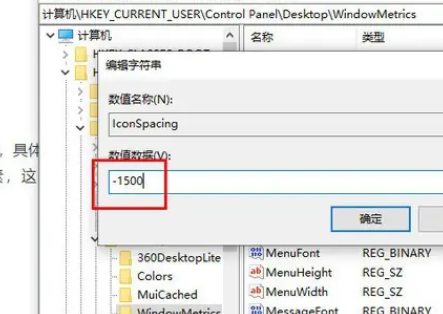
4. “IconSpacing”表示桌面图标水平间距,默认为:-1125,其换算公式为:该值=-15*间距像素值,即-1125表示图标间距为75像素,我们将其改为-1500,即表示间距为100像素,如下图所示。
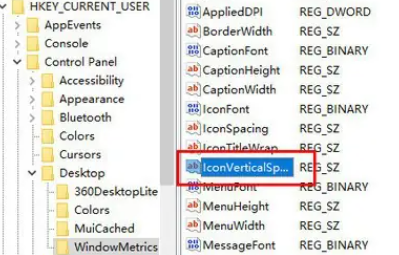
5. 同理,在该注册表项中查找名为“IconVerticalSpacing”的字符串值,该值与水平间距应保持一致,否则图标布局将显得不太美观,如下图所示。
6. 最后重新启动系统以实现更改,如下图所示。


 苏公网安备32032202000432