win7系统怎么跳过硬盘自检
我们都清楚,电脑中在不正常关机或者出现硬盘故障之后,系统就会启动硬盘自检,严重的甚至每次开机都会进行自检,当然如果对设备状态了然于心的话,也能够通过设置跳过硬盘自检,那么win7系统怎么跳过硬盘自检呢?今天为大家分享win7系统跳过硬盘自检的操作方法。
跳过硬盘自检操作方法:
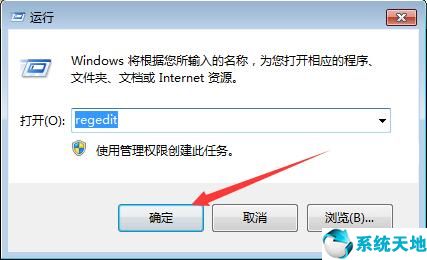
1、打开设备,调出运行窗口,输入命令“regedit”后,按下“确定”按钮;如图所示:
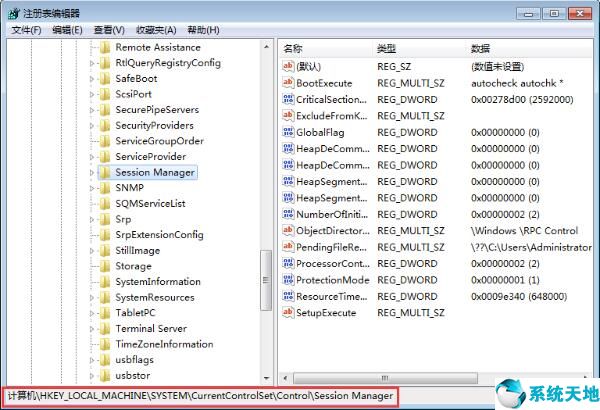
2、待注册表编辑器弹出后,定位至“HKEY_LOCAL_MACHINESYSTEMCurrentControlSetControlSession Manager”;如图所示:
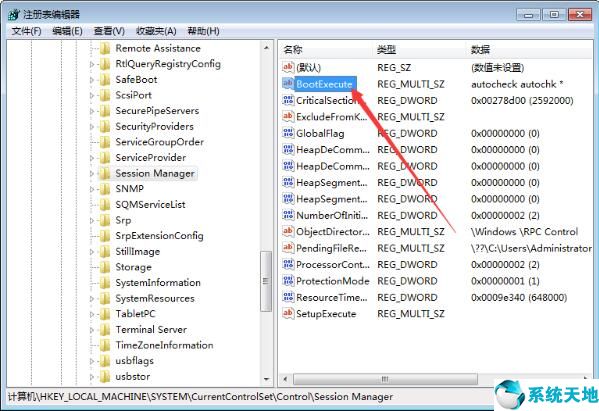
3、在右侧窗口找到“BootExecute”项目,并双击打开;如图所示:
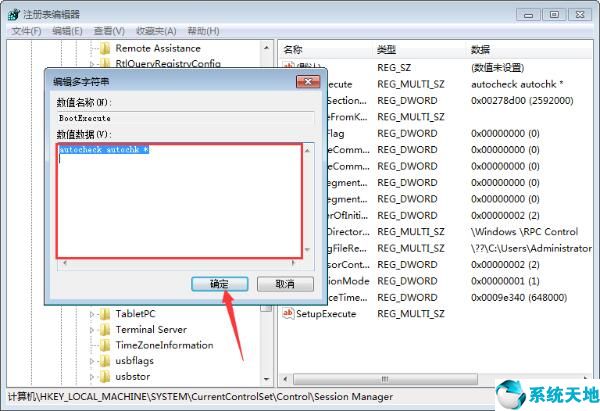
4、最后,将此项中的数值数据清空,再按下“确定”按钮保存即可。如图所示:
关于win7系统跳过硬盘自检的操作方法就为小伙伴们详细分享到这里了,如果用户们使用电脑的时候不知道怎么跳过硬盘自检,可以参考以上方法步骤进行操作哦,希望本篇教程对大家有所帮助
本文来源于Win10专业版,转载请注明出处。
跳过硬盘自检操作方法:
1、打开设备,调出运行窗口,输入命令“regedit”后,按下“确定”按钮;如图所示:
2、待注册表编辑器弹出后,定位至“HKEY_LOCAL_MACHINESYSTEMCurrentControlSetControlSession Manager”;如图所示:
3、在右侧窗口找到“BootExecute”项目,并双击打开;如图所示:
4、最后,将此项中的数值数据清空,再按下“确定”按钮保存即可。如图所示:
关于win7系统跳过硬盘自检的操作方法就为小伙伴们详细分享到这里了,如果用户们使用电脑的时候不知道怎么跳过硬盘自检,可以参考以上方法步骤进行操作哦,希望本篇教程对大家有所帮助
本文来源于Win10专业版,转载请注明出处。


 苏公网安备32032202000432