Win10与Win7怎样组建局域网?Win10与Win7组建局域网的方法
近几日很多用户询问小编Win10与Win7怎样组建局域网?接下来,小编就为在座的用户们带来了Win10与Win7组建局域网的方法,感兴趣的用户快来下文看看吧。
Win10与Win7怎样组建局域网?
1、设置【网络位置】win10点击开始后选择设置按钮,win7设置网络位置可参照其他网络经验,过程相似在此不再重复。
2、选择【网络和Internet】。

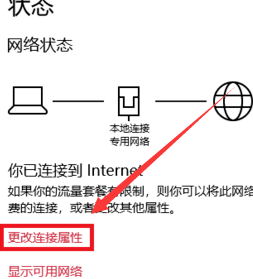
3、选择【更改连接属性】。

4、确保选择了【专用】网络,到此win10网络位置设置完成,win7的电脑将网络位置选择为工作或家庭网络即可,建议选择工作网络。
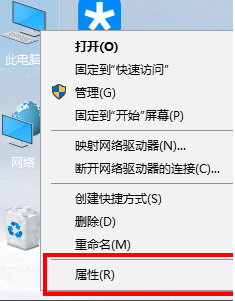
5、设置win10工作组,【此电脑】鼠标右键选择【属性】。
6、选择【更改设置】。

7、选择【网络ID】。

8、选择第一个选项。
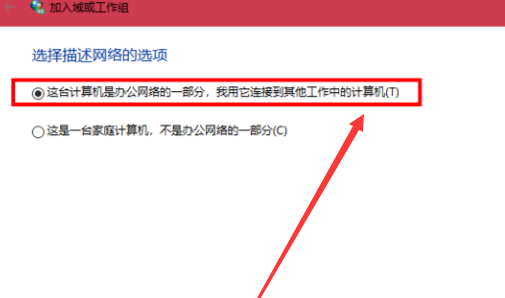
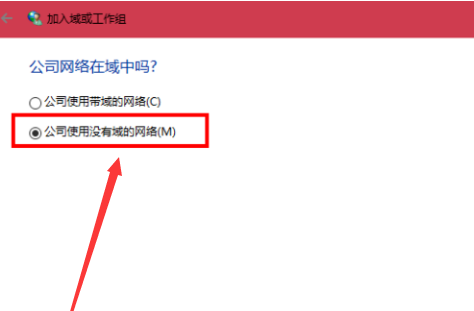
9、如果局域网内没有设置【域】选择【公司使用没有域的网络】。
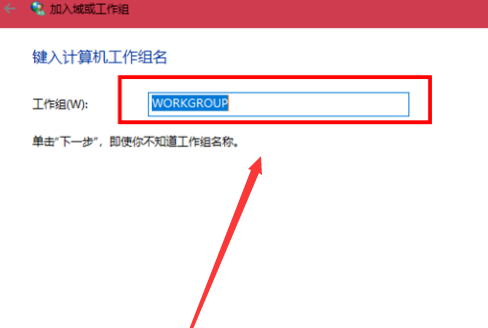
10、输入工作组的名称,默认为【WORKGROUP】,需要共享的电脑必须保证工作组名称一致。
11、完成设置,点击【去顶】,重启电脑。


 苏公网安备32032202000432